How to write a biography with Claude and ProofBound
One sentence in, a finished book out. This is the whole process — every prompt, every decision point, and what you'll see on screen — for writing a life story inside Claude and publishing it through ProofBound.
Before you start
You need a Claude account and a free ProofBound account. That's it — nothing to install.
The walkthrough below was recorded in Claude Code, but the same steps work in Claude Desktop and Claude on the web. The division of labor never changes: Claude writes, ProofBound typesets. You steer at four gates — intake, title, outline, and publish — and can interrupt at any point in between.
The seven steps
-
Add the ProofBound connector
Follow the two-minute setup on the connector page: in Claude, open Settings → Connectors → Add custom connector, name it anything you like, and paste the address below. Sign in to ProofBound when Claude asks, and approve the access.
https://mcp.proofbound.com/mcp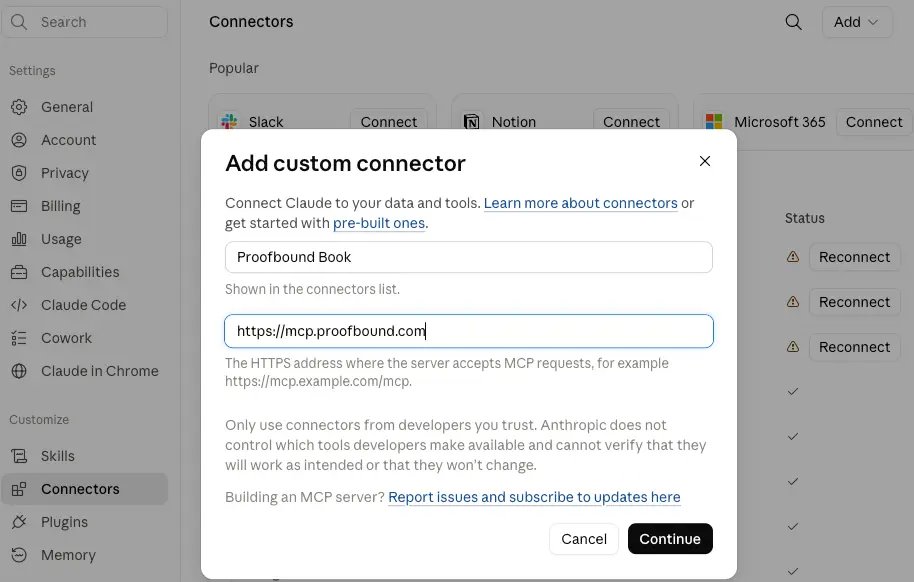
Claude → Settings → Connectors → Add custom connector. -
Say what book you want
One or two sentences is enough: who the book is about, and the tone you're after. Claude reads ProofBound's book-writing workflow and starts intake on its own — you don't have to ask for anything by name.
Let's write a book about J.K. Rowling. It's a biography, written in an inspiring upbeat tone but should show the human side including some of her failures.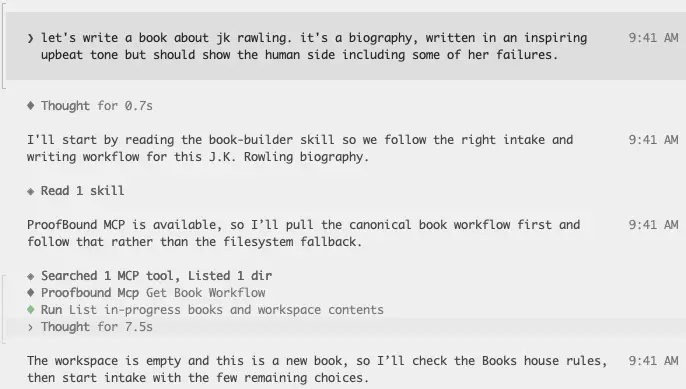
Claude pulls the ProofBound workflow and checks for an in-progress book before starting fresh. -
Answer the intake questions — or don't
Claude comes back with a working thesis, a recommended structure, and a short list of choices: who the reader is, how far into the subject's later years to go, how long the book should be, and whose name goes on the cover. Every question has a sensible default, so you can answer all of them, some of them, or just say "your call."
Here is the reply that produced the book in this walkthrough:
1. literary/biographical audience, 2. whole arc, with later years in more depth, 3. standard, 4. pseudonym (make up a female-sounding name) and build a research dossier from public sources, text only. What the author typed, verbatim.
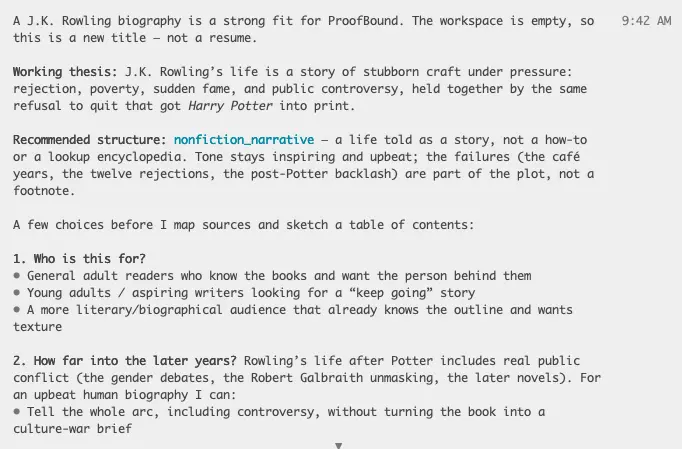
The intake gate: thesis, structure, and a handful of choices with defaults. -
Let it research, then pick a title
Claude now gathers public sources into a research dossier — a chronology, the key episodes, the quotes it can stand behind. In Claude Code the dossier is saved as files alongside the manuscript so you can read it. This is the longest unattended stretch; expect several minutes.
When the research map is ready, Claude restates the thesis, reader, shape, and byline, then offers a few title options with a sentence on what each one signals. Correct anything that's wrong — a date, an emphasis, the byline — and choose a title.
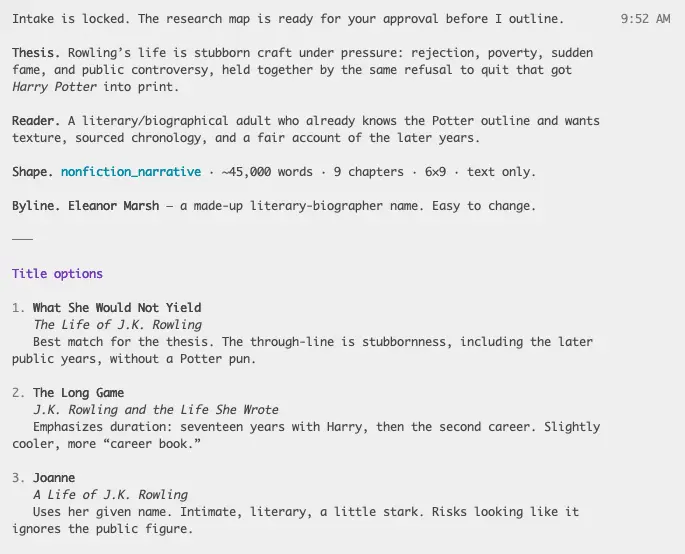
Three titles, each with its subtitle and what it emphasizes. This book became Joanne. -
Shape the outline
Next comes a chapter-by-chapter outline: a title and the territory each chapter covers. This is the most useful place to intervene. Ask for a chapter to be split or merged, add a theme you care about, cut one you don't, or reorder the sequence. Claude revises the outline and shows it again.
When it reads the way you want, say approve or start writing.
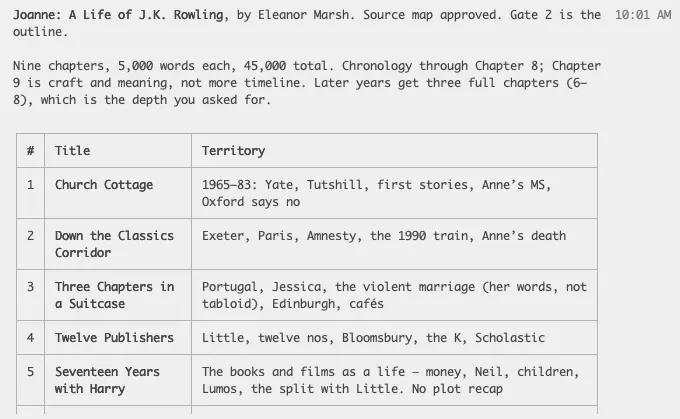
The outline gate. Nine chapters of about 5,000 words each; the later years get three full chapters, as requested at intake. -
Let it write
Claude drafts the chapters one after another, checking each against the outline and the research dossier as it goes. You can leave it running, or pause at any time to read a sample chapter and adjust the voice before it continues. If you step away, come back and say continue.
Want to see how the drafting loop works under the hood? The connector page describes the guided write workflow Claude follows.
-
Publish to ProofBound
When the last chapter is done, ask Claude to upload to ProofBound (or simply "publish"). The manuscript is typeset in the background and appears in My Books on ProofBound, with a generic cover and a page count — ready to download, order in print, or finish with a designed cover.
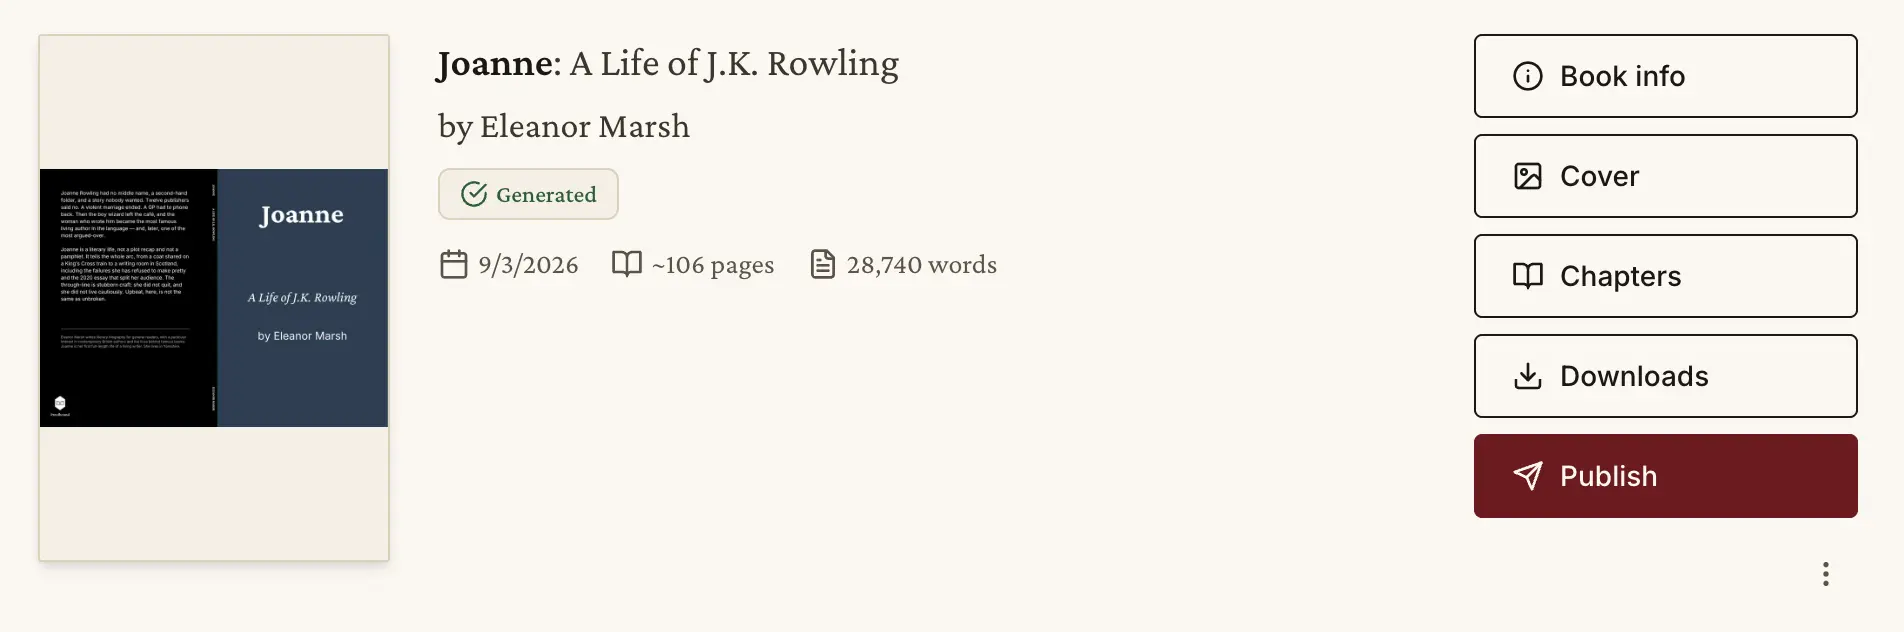
The result in My Books: fully rendered, ready to publish.
What came out
- Title
- Joanne: A Life of J.K. Rowling
- Byline
- Eleanor Marsh (a pseudonym Claude invented at intake)
- Shape
- Nonfiction narrative, 9 chapters, 6×9, text only
- Length
- About 106 pages
- Your typing
- One opening sentence, one intake reply, a title choice, and "approve"
Everything else — research, structure, prose — Claude did in conversation, and ProofBound turned the result into a book.
Extras: what you can do once it's on ProofBound
Uploading is the end of the writing and the start of the publishing. Everything below happens on the web, from the book's page in My Books.
Generate a real cover
Get a high-quality, print-ready cover designed for your book, with the spine width worked out from the page count. Or upload your own artwork and ProofBound sets the type and lays out the wrap.
Make a Kindle edition
Produce an EPUB that's ready to upload to Amazon KDP alongside the print files. The step-by-step KDP guide walks you through publishing under your own name.
Change the trim size
Re-typeset the same manuscript at a different size in one click. Try A5 or Digest (5.5×8.5 in) for a compact book that sits nicely in the hand.
Sell it, royalty-free
List the book in the ProofBound shop, where readers can preview it and order printed copies. Or grab the link and put it on your own site. You keep 100% of royalties.
Add an index
Turn on a back-of-book index and ProofBound builds it from the text, with hyperlinked page locators in the PDF.
And more
Edit chapters in the browser, tweak the subtitle and author details, preview page by page, order a proof copy, or re-render as many times as you like while you polish.
Tips from this run
Name the failures you want included. "Inspiring but human, including some of her failures" is what kept the book from turning into a press release. Tone words in the very first prompt carry through every chapter.
Decide the depth at intake. Asking for "later years in more depth" is why three of nine chapters cover the post-Potter period. It's much cheaper to say this before the outline than to rebalance afterwards.
Use a pseudonym if you're not the author. A biography drafted this way is a starting point, not scholarship. Publishing under a made-up byline, and checking the sources in the dossier before you put your own name on it, is the honest default.
Read one chapter early. Pausing after chapter one to check the voice costs a minute; discovering the voice is wrong after chapter nine costs a rewrite.
See the finished book
Don't take our word for it. The book this walkthrough produced is in the ProofBound shop — read the preview, page through the chapters, or order a printed copy.
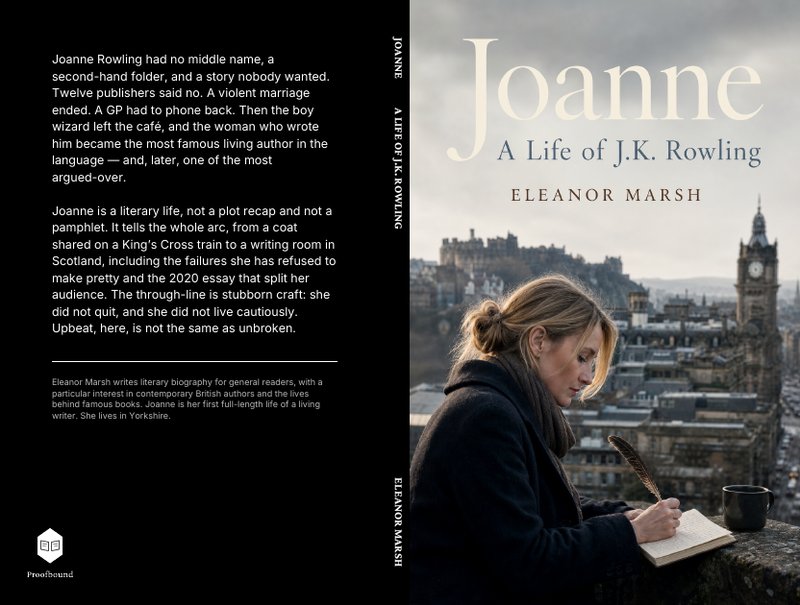
The full print wrap — back cover, spine, and front — exactly as it went to the printer.
Write your own
Swap the subject and the tone, keep the steps. The same workflow handles a family history, a company founder, a mentor, or yourself.
Writing and rendering over the connector are free, up to 50 renders every 30 days. Free renders carry a small ProofBound credit line; a designed cover and printing happen on the web with ProofBound Basic.